Pelican から Hugo への移行検討

Pelicanで作っている既存のブログをHugoに移行できないか検討しています。普段Windowsを使っているので、Windows(+ VSCode)で記事を書くことを前提に検討してみます。

Pelican から Hugo への移行検討

hugoのインストール

https://github.com/gohugoio/hugo/releases から最新のファイルをダウンロード。

C:\dev\binhugo.exe を設置。

試しにサイトを作ってみる。

 1
 2
 3
 4
 5
 6
 7
 8
 9
10
11
12
13
PS C:\dev\ainoniwa> hugo new site ainoniwa-hugo
Congratulations! Your new Hugo site is created in C:\dev\ainoniwa\ainoniwa-hugo.

Just a few more steps and you're ready to go:

1. Download a theme into the same-named folder.
   Choose a theme from https://themes.gohugo.io/ or
   create your own with the "hugo new theme <THEMENAME>" command.
2. Perhaps you want to add some content. You can add single files
   with "hugo new <SECTIONNAME>\<FILENAME>.<FORMAT>".
3. Start the built-in live server via "hugo server".

Visit https://gohugo.io/ for quickstart guide and full documentation.

Theme(hugo-theme-stack)のインストール

今回は見た目で https://themes.gohugo.io/themes/hugo-theme-stack/ が気に入ったので、これが使えないか検討していきます。
Pelicanで使っているFlexテーマとも似てますしね。

1
2
3
4
git clone https://github.com/CaiJimmy/hugo-theme-stack.git themes/hugo-theme-stack
cd themes/hugo-theme-stack
git checkout tags/v3.16.0 -b v3.16.0
cd ../../

補足

テーマのインストールには hugo mod が利用できると便利です。 このコマンドはGo Modulesに依存しているので、利用したい場合はGoをインストールしておきます。

以下はWindowsでGo 1.18をインストールするコマンド例。

1
PS C:\dev> winget install GoLang.Go.1.18

Themeの適用

次に、基本ページのファイルをテーマのサンプルディレクトリからコピーします。

1
2
3
4
5
6
7
mkdir -p content/page
cp themes/hugo-theme-stack/exampleSite/config.yaml ./config.yaml
cp themes/hugo-theme-stack/exampleSite/content/_index.md ./content/
cp themes/hugo-theme-stack/exampleSite/content/page/about/index.md ./content/page/about.md
cp themes/hugo-theme-stack/exampleSite/content/page/archives/index.md ./content/page/archives.md
cp themes/hugo-theme-stack/exampleSite/content/page/search/index.md ./content/page/search.md
rm config.toml

元から置いてあった config.toml は削除します。 (将来的にはconfig.tomlに移行するようなので、v4のリリースを待ちましょう)

Hugoの起動

hugo serve コマンドで起動して、サンプルページを確認してみます。

1
hugo serve

使用するテーマにもよりますが、今回のように hugo-theme-stack と hugo_0.105.0_windows-amd64.zip の組み合わせで使用した場合、以下のエラーが出る場合があります。

1
Error: Error building site: TOCSS: failed to transform "scss/style.scss" (text/x-scss). Check your Hugo installation; you need the extended version to build SCSS/SASS.: this feature is not available in your current Hugo version, see https://goo.gl/YMrWcn for more information

https://themes.gohugo.io/themes/hugo-theme-stack/ を使用する場合は、代わりに hugo_extended_0.105.0_windows-amd64.zip を使用しましょう。

記事の追加

起動が確認出来たら、記事を追加してみます。

hugoでは、記事を追加するコマンドと、それに対応したテンプレートが適用される便利な機能があります。
まずは共通テンプレートとして archetypes/default.md を編集します。
archetypes/default.md 自体は hugo new site した際に、自動生成されています。

 1
 2
 3
 4
 5
 6
 7
 8
 9
10
---
author: ruy
date: {{ .Date }}
slug: {{ substr .Date 0 10 }}
title: "{{ substr .Name 11 | title }}"
description: 
tags:
  - tag
draft: true
---

記事を追加する場合は hugo new post/article_name.md のように実行します。

hugo-theme-stack では 記事と画像をセットにしたディレクトリで管理する ことを推奨しています。
ディレクトリの整理を簡単にするために hugo new post/$(date +%Y-%m-%d)_migrate_blog_pelican_to_hugo/index.md のようなコマンドをaliasに登録しておくと良いでしょう。

デプロイ

hugo コマンドを実行すると public というディレクトリにHTMLが生成されるようです。
これをWebサーバーに置くだけ。

Hugo標準で問題なさそうなもの

Sitemap対応

どうやら Hugoデフォルトで対応 しているようです。
以下のように書くと /sitemap.xml が一覧を返してくれるようになります。

1
2
3
4
sitemap:
  changefreq: weekly
  filename: sitemap.xml
  priority: 0.5

RSS対応

特に何もしなくても /index.xml がRSSになりそうです。
Vivaldiで登録してみたところ、ひとまず読めたのでそのままにしました。

hugo-theme-stackの機能確認

Profileの画像

assets/img/profile.jpg みたいに設置して、以下のように書けば良いみたいです。

1
2
3
4
5
6
params:
  sidebar:
    avatar:
      enabled: true
      local: true
      src: img/profile.jpg

Profile下のアイコン

menu.social を書くと、よくあるリンクが並びます。

  • name のアルファベット順に左から並ぶようだったので 01_ のようなプレフィックスを付けています
  • newTab: false とすると同じタブで開くリンクになります
  • icon: に書けるのがデフォルトだと hugo-theme-stack の準備したアイコン用SVGだけみたいなので、メールアイコンは https://feathericons.com から拝借して assets/icons/ に置きました。
 1
 2
 3
 4
 5
 6
 7
 8
 9
10
11
12
13
14
15
16
17
18
19
20
21
22
23
24
25
26
27
28
menu:
    social:
        - identifier: home
          name: 01_Home
          url: https://ainoniwa.net
          params:
            icon: home
            newTab: false
        - identifier: twitter
          name: 02_Twitter
          url: https://twitter.com/team_eririn
          params:
              icon: brand-twitter
        - identifier: github
          name: 03_GitHub
          url: https://github.com/ainoniwa/
          params:
              icon: brand-github
        - identifier: mail
          name: 04_Mail
          url: mailto:ruy@ainoniwa.net
          params:
              icon: mail
        - identifier: rss
          name: 05_RSS
          url: /index.xml
          params:
              icon: rss

検索機能

インクリメンタルサーチ機能が搭載されています。中々処理が速くて良い感触でした。
Pelicanのtique_searchでは日本語の検索が上手くいかなくなっていたので、移行とセットで解決出来そうです。
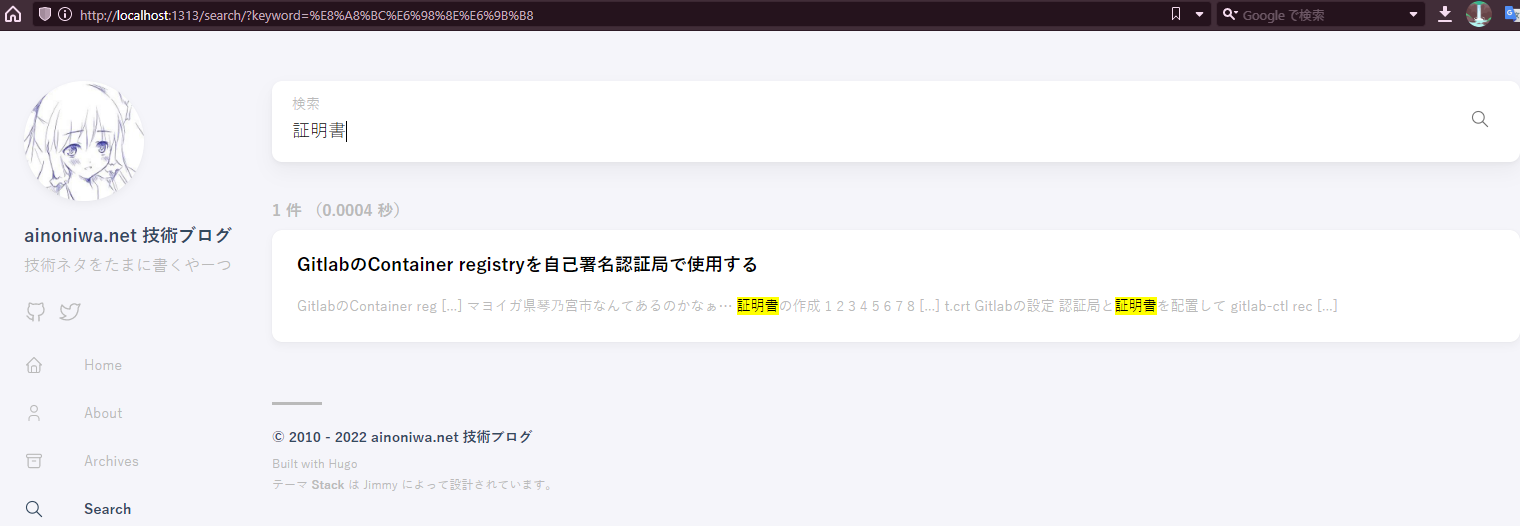
hugo-theme-stack search view

フォントの問題

中国向けフォントがデフォルトで使用されるので assets/scss/custom.scss を以下のように作成しました。

1
2
3
4
5
6
7
8
9
/* Place your custom SCSS in HUGO_SITE_FOLDER/assets/scss/custom.scss */
:root {
    --sys-font-family: -apple-system, BlinkMacSystemFont, "Segoe UI", "Droid Sans", "Helvetica Neue";
    --zh-font-family: "PingFang SC", "Hiragino Sans GB", "Droid Sans Fallback", "Microsoft YaHei";
    --ja-font-family: "游ゴシック体", "Yu Gothic", YuGothic, "ヒラギノ角ゴ Pro", "Hiragino Kaku Gothic Pro", "メイリオ", "Meiryo";

    --base-font-family: var(--ja-font-family), "Lato", var(--sys-font-family), var(--zh-font-family), sans-serif;
    --code-font-family: Menlo, Monaco, Consolas, "Courier New", monospace;
}

Hugoがサイトをbuildすると、rootディレクトリとTheme内のディレクトリは統合されます。 そのためrootディレクトリに、Theme内と同じディレクトリ名でファイルを追加するとThemeのファイルに影響を与えずに読み込めるようになります。
https://aakira.app/blog/2018/08/share/

なるほどーーー、それならテーマに直接手を加えなくて良さそうです。

404ページ

hugo-theme-stack は割ときれいな404ページが出ます。
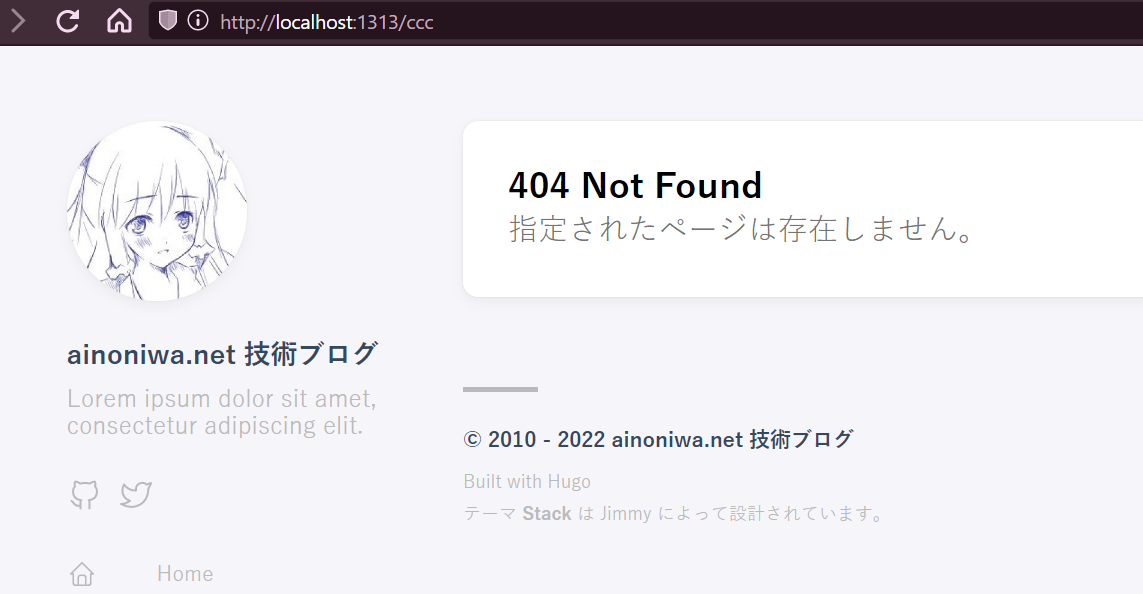
hugo-theme-stack 404 page

記事下部に関連ページを表示

hugo-theme-stack にデフォルトて搭載されています。
カテゴリはいまいち役立っていないので削除して、タグで主たる関連を出すようにします。dateは並び順を調整するのに入れているくらいです。

1
2
3
4
5
6
7
8
9
related:
    includeNewer: true
    threshold: 20
    toLower: false
    indices:
        - name: tags
          weight: 100
        - name: date
          weight: 5

Pelicanからの記事の移行

Markdownで書いてあるものについては、一部修正するだけで移行できそうです。
問題はreStructuredTextで書かれたもの…
記事と画像をセットにしたディレクトリで管理する方式が今までと違うので、ファイルの移動は少し骨が折れそうですが…
PelicanもHugoもslugが使えるので、一貫性のあるURLを作ってあればリダイレクトできそうなところは助かります。
Wordpressの頃の検索やタグリンクも、一応リダイレクトできそうです。

hugo-theme-stackに足りないもの

Admonition対応

所謂、以下のように書くやつのことです。

1
2
!!! hint
    some explains...

HugoのMarkdownではどうもこの記法が無いようです。

https://gohugo.io/contribute/documentation/#admonitions によると、shortcodesを追加すると独自の記法で対応できるらしいです。
hugo-theme-stackの場合は、以下で対応できました。

  • assets/scss/custom.scss にAdmonition SCSSを書く
  • layouts/shortcodes にAdmonition HTMLを書く

中身は https://github.com/dillonzq/LoveIt のコードを参考にしました。
アイコン表示に関してはFont Awesomeを使用するので、以下の対応を追加しました。

  • Font Awesome v6のCSSを static/fontawesome6/css/all.min.css に格納
  • Font Awesome v6のWebfontsを static/fontawesome6/webfonts/fa-brands-400.woff2 に格納
  • Font Awesome v6のWebfontsを static/fontawesome6/webfonts/fa-solid-900.woff2 に格納
  • layouts/partials/head/custom.html を作成して <link rel="stylesheet" href="{{ .Site.BaseURL }}fontawesome6/css/all.min.css"> とだけ記載
This is a tip
もちろん、CDNを使用する人は <link rel="stylesheet" href="https://cdnjs.cloudflare.com/ajax/libs/font-awesome/6.1.2/css/all.min.css"> と書くだけでも良いです。

ただ、対応したのは良いのですが、一般的なMarkdownの記法からは外れてしまうので積極的には使わないだろうなと思います。
そう考えるとfont-awesomeみたいな重たいファイルをロードするのも考え直した方が良いかもしれませんね。

Admonitionお試し

通常時のコードハイライト

1
2
sample:
  code: this is sample.
This is a note

A note banner
日本語文章だとこうなります。

Admonition内部のコードハイライトは微調整した方が良いかもしれません。

1
2
sample:
  code: this is sample.
This is a abstract
A abstract banner
This is a tip
A tip banner

記事の共有ボタン

無いので自分で足します。

hugo-theme-stack では以下のように設定を書くと layouts/partials/widget/{{ type }}.html なwidgetを読み込んでくれます。

1
2
3
4
params:
  widgets:
    page:
      - type: sharebutton

そして layouts/partials/widget/sharebutton.html を追加します。

 1
 2
 3
 4
 5
 6
 7
 8
 9
10
11
12
13
14
15
16
17
18
{{- $context := .Context -}}
<section class="widget archives">
    <h2 class="widget-title section-title">Share:</h2>
    <ul class="widget-social">
        <li><a href="https://twitter.com/intent/tweet?url={{ $context.Permalink }}&text={{ $context.Title }}" class="sc-twitter" target="_blank" title="Share on Twitter">
          <i class="fab fa-twitter"></i>
        </a></li>
        <li><a href="https://www.facebook.com/sharer/sharer.php?u={{ $context.Permalink }}&t={{ $context.Title }}" class="sc-facebook" target="_blank" title="Share on Facebook">
            <i class="fab fa-facebook"></i>
        </a></li>
        <li><a href="https://www.reddit.com/submit?url={{ $context.Permalink }}&title={{ $context.Title }}" class="sc-reddit" target="_blank" title="Share via Reddit">
        <i class="fab fa-reddit-alien"></i>
        </a></li>
        <li><a href="mailto:?subject={{ $context.Title }}&body={{ $context.Permalink }}" class="sc-envelope" target="_blank" title="Share via Email">
        <i class="fas fa-envelope"></i>
        </a></li>
    </ul>
</section>

assets/scss/custom.scss には以下のように追加しました。

 1
 2
 3
 4
 5
 6
 7
 8
 9
10
11
12
13
14
15
16
17
18
19
20
21
22
23
24
25
26
27
28
29
30
31
32
33
34
35
36
37
38
39
40
41
42
43
44
45
46
47
48
49
50
51
52
53
54
// Social button colors
$email-bg-color: #578ad6;
$facebook-bg-color: #3e5b98;
$reddit-bg-color: #ff4500;
$twitter-bg-color: #4da7de;

// Share button for widget
ul.widget-social {
  font-size: 1.6em;
  padding: 0px;
  margin: 0px;
  line-height: 0;

  li {
    display: inline;
  }

  a:hover {
    z-index: 2;
    -webkit-transform: translateY(-2px);
    transform: translateY(-2px);
  }

  a {
    display: inline-block;
    width: 36px;
    height: 36px;
    border-radius: 100%;
    text-align: center;
    font-size: .85em;
    line-height: 38px;
    color: white;
  }

  a.sc-facebook {
    background-color: $facebook-bg-color;
    padding-top: 1px;
  }

  a.sc-twitter {
    background-color: $twitter-bg-color;
    padding-top: 1px;
    padding-left: 2px;
  }

  a.sc-at, a.sc-mailbox, a.sc-envelope {
    background-color: $email-bg-color;
  }

  a.sc-reddit {
    background-color: $reddit-bg-color;
  }

}

これで、個別の記事を表示しているときは右サイドバーの上部にシェアボタンが表示されます。

Share button view

CSS/LESSをSCSSに変換した時に使ったサイト:

外部リンクに対する target="_blank" の調整

外部サイトのリンクの場合は新しいタブで開く動作をデフォルトにしておきたいところです。
元々 hugo-theme-stack には http から始まるリンクを新しいタブで開くようになっているのですが、追加で以下の条件の場合も target="_blank" rel="noopener" を付与するようにします。

  • リンク先アドレスが BaseURL で始まらない(≒自サイトは絶対URLで書いても新しいタブで開いて欲しくない)

以下のような layouts\_default\_markup\render-link.html を作成します。

1
2
3
<a class="link" href="{{ .Destination | safeURL }}" {{ with .Title}} title="{{ . }}"
    {{ end }}{{ if and (strings.HasPrefix .Destination "http") (not (strings.HasPrefix .Destination .Page.Site.BaseURL)) }} target="_blank" rel="noopener"
    {{ end }}>{{ .Text | safeHTML }}</a>

お試し:

1
2
3
4
* [Google](https://google.co.jp) -> 外部サイトなので新しいタブ
* [ainoniwa.net](https://ainoniwa.net) -> 同じドメインだけどHugoのBaseURLと一致しないから新しいタブ
* [About (Relative path)](/about/) -> 同じサイト内の相対リンクなので同じタブ
* [About (Absolute path)](https://hugo.ainoniwa.net/about/) -> 同じサイト内の絶対リンクでも同じタブ

.Page.Site.BaseURL はconfig.yamlのbaseurlを参照しているわけではないらしく、ローカルで動かした時は http://localhost:1313 になっていました。

canonifyurls を設定するという方法もあるらしいのですが、今回はテーマ側が render-link.html を持っていたため、これを上書きする方法で解消しました。

PlantUMLの代替(Mermaid)

Pelican(Flex)時代はPlantUMLを使ってシーケンス図を表示するようにしていたので、Hugoでの方法を探してみます。

hugo-theme-stack Issue#220 でも話題になっていましたが、公式ドキュメント CONTENT MANAGEMENT - Diagrams に方法が書かれていました。
scriptのロードは layouts/partials/footer/custom.html に記載しました。

こう書くと

 1
 2
 3
 4
 5
 6
 7
 8
 9
10
11
12
13
```mermaid
sequenceDiagram
    participant Alice
    participant Bob
    Alice->>John: Hello John, how are you?
    loop Healthcheck
        John->>John: Fight against hypochondria
    end
    Note right of John: Rational thoughts <br/>prevail!
    John-->>Alice: Great!
    John->>Bob: How about you?
    Bob-->>John: Jolly good!
```

こうなります。

sequenceDiagram participant Alice participant Bob Alice->>John: Hello John, how are you? loop Healthcheck John->>John: Fight against hypochondria end Note right of John: Rational thoughts
prevail! John-->>Alice: Great! John->>Bob: How about you? Bob-->>John: Jolly good!

[許容] 記事中のToC

記事の上部に目次を出して記事の横幅を広く取りたかったんだけど、右サイドバーに出る目次一覧しか無いらしい。
まぁそれで良いか。という気分になったので許容しました。

[廃止] Matomo(Piwik)対応

自前のアクセス解析サーバー(Matomo)を立てているので、この対応もしようと思ったのですが、
思い返すとMatomoは運用が面倒な割に特段得るものも無いので、この機会に自前のMatomo(Piwik)を捨てることにしました。

なんたる怠惰。

終わり

Go言語で作られているだけあって、WindowsでHugoを使うのは想像以上にハードルが低くて助かりました。

テーマの周辺もある程度は折り合いが付きそうなので記事を書くだけなら問題なさそうです。
ついでにPelicanで抱えていら日本語の検索周りの問題とか、ビルドが遅い問題とか、その他諸々も解決できそうです。
ReSTで書かれたやつをどうするのかは…未来の自分が何とかするとして。

あとは、サーバーにデプロイするための準備をするということで、この話はひとまずここまで。

参考文献

Licensed under CC BY-NC-SA 4.0
Built with Hugo
テーマ StackJimmy によって設計されています。